 Save to Pinterest
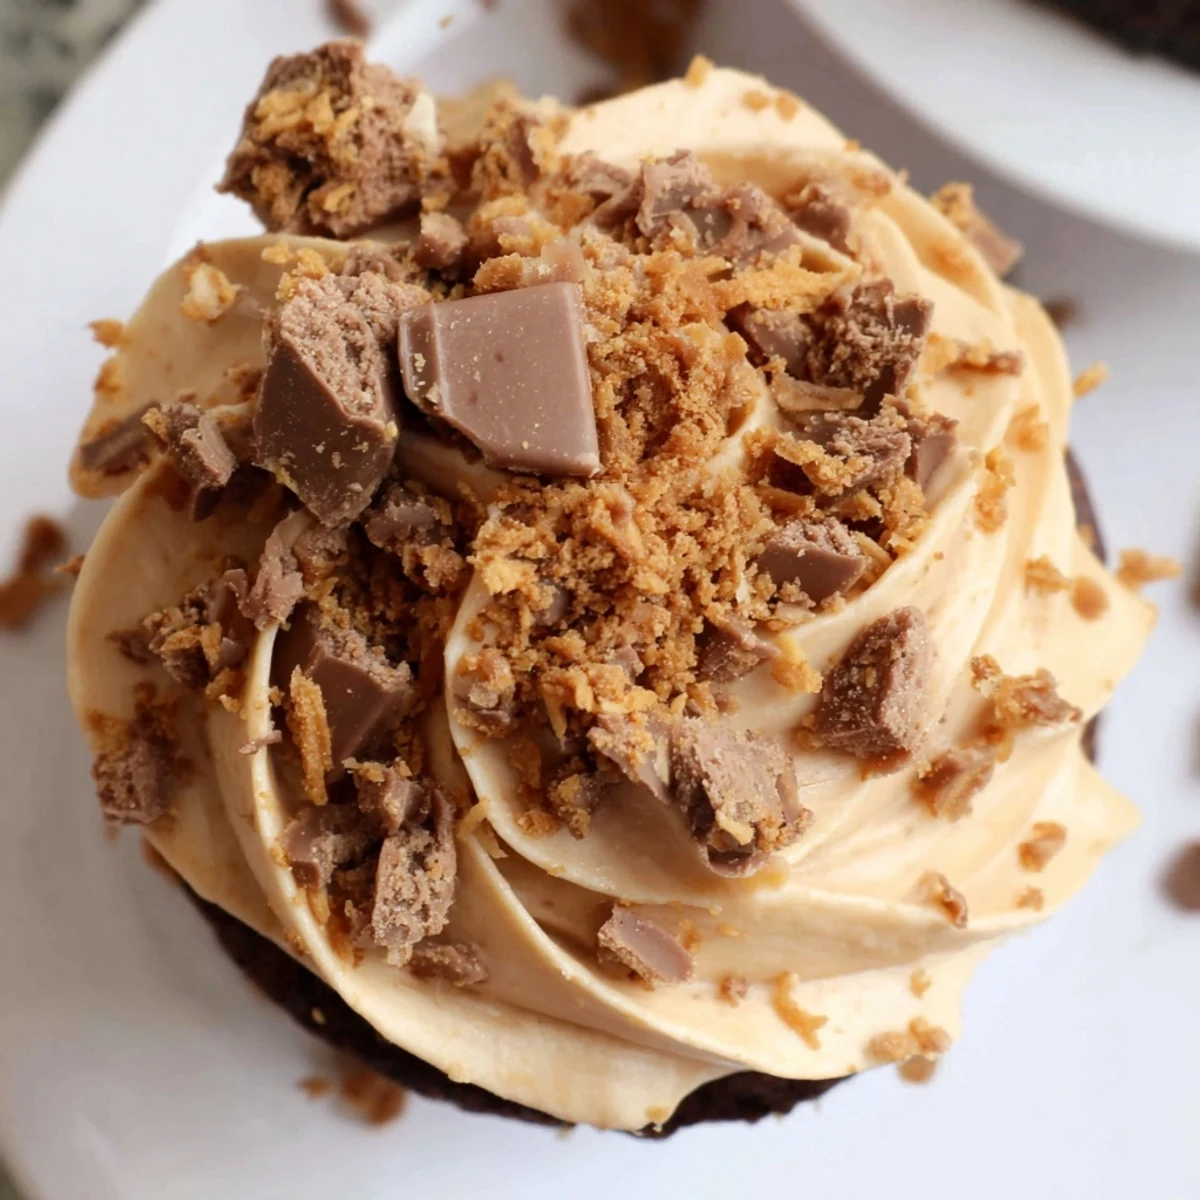
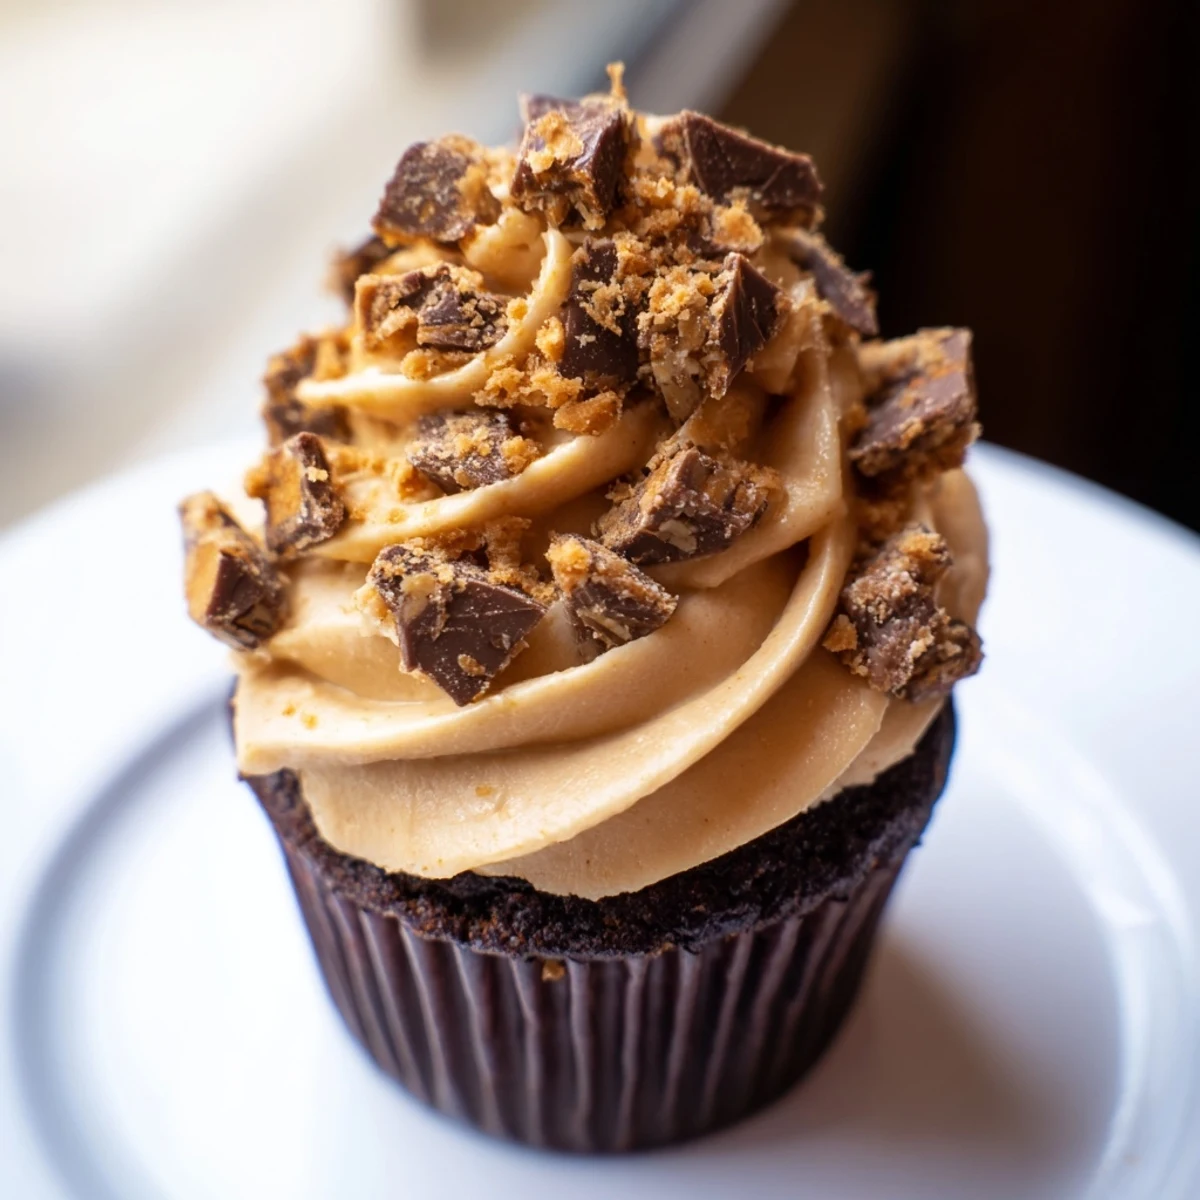
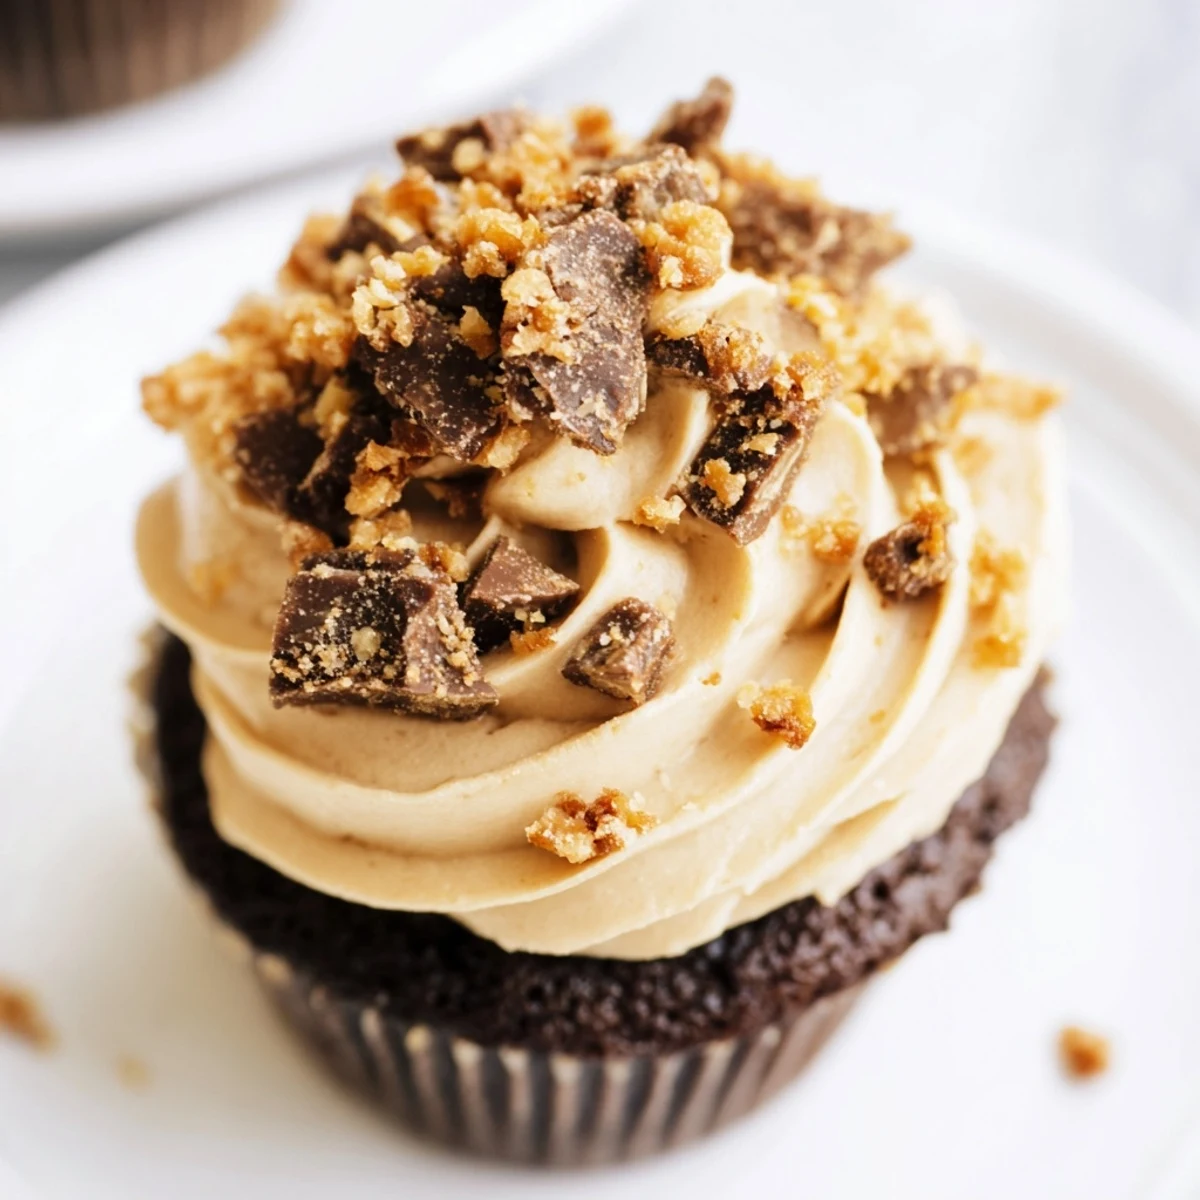
 These indulgent chocolate cupcakes feature a moist, rich cocoa base complemented by a surprise center of smooth peanut butter filling. The crowning glory is a fluffy buttercream frosting infused with crushed Butterfinger candy bars, creating the perfect balance of sweet, salty, and crunchy textures. Each bite delivers the classic combination of chocolate and peanut butter, elevated by the distinctive buttery toffee flavor of Butterfinger pieces both in the frosting and sprinkled on top.
My youngest brother announced he wanted Butterfinger everything for his birthday last year. I'd never actually baked with those candy bars before, something about the texture seemed tricky to work into batter. But watching his face when I brought out these cupcakes made all the experimenting worth it. Now they're the most requested treat in our house.
I made these for our annual family potluck last summer. My aunt who claims she doesn't like sweets went back for seconds and actually took some home. The secret is getting that peanut butter filling right in the center so it's a complete surprise when someone bites in.
Ingredients
- All-purpose flour: Forms the foundation of our chocolate cupcake base, providing structure while keeping the crumb tender
- Unsweetened cocoa powder: Use a good quality Dutch-processed cocoa for that deep, intense chocolate flavor that stands up to the sweet frosting
- Granulated and light brown sugar: The combination gives you sweetness plus moisture from the brown sugar's molasses content
- Baking soda and powder: Work together to give these cupcakes the perfect lift and tender texture
- Unsalted butter, melted: Adding melted butter instead of room temperature keeps these cupcakes incredibly moist with a dense, satisfying crumb
- Large eggs, room temperature: Bring your eggs to room temperature before mixing so they incorporate evenly and create better structure
- Whole milk and hot brewed coffee: The coffee intensifies the chocolate flavor without making these taste like coffee at all
- Creamy peanut butter: Use a mainstream brand like Jif or Skippy for the smoothest filling and frosting texture
- Powdered sugar: Essential for both the creamy filling and the fluffy frosting that holds its shape
- Heavy cream: Start with two tablespoons and add more as needed to get that perfect pipeable consistency
- Butterfinger candy bars: Crush some finely for the frosting and chop others coarsely for that signature crunch on top
Instructions
- Prepare your oven and pan:
- Preheat oven to 350°F (175°C) and line a 12-cup muffin tin with cupcake liners, taking care to get them centered in each cup.
- Whisk together the dry ingredients:
- In a large bowl, combine flour, cocoa powder, both sugars, baking soda, baking powder, and salt until everything is evenly distributed.
- Mix the wet ingredients:
- In a separate bowl, whisk melted butter, eggs, and vanilla until smooth, then stir in the milk and hot coffee until combined.
- Combine and portion the batter:
- Pour wet ingredients into dry and mix until just combined, then divide batter evenly among cupcake liners filling about two-thirds full.
- Bake to perfection:
- Bake for 16-18 minutes until a toothpick inserted in the center comes out clean, then cool in the pan for 5 minutes before transferring to a wire rack.
- Make the peanut butter filling:
- Beat peanut butter and softened butter together until completely smooth, then add powdered sugar and milk, mixing until creamy and spreadable.
- Core and fill the cupcakes:
- Once cupcakes are completely cool, use a small knife or cupcake corer to remove the center of each about one inch deep, then fill each cavity with the peanut butter mixture.
- Prepare the Butterfinger frosting:
- Beat butter until creamy, then add powdered sugar, peanut butter, heavy cream, and vanilla, beating until fluffy before folding in the finely crushed Butterfinger bars.
- Frost and garnish:
- Frost each cupcake generously using your favorite piping technique or an offset spatula, then immediately sprinkle with the coarsely chopped Butterfinger pieces.
 Save to Pinterest
 These have become my go-to for bake sales and office parties because they transport so well. Last week my coworker said they reminded her of the candy bars her grandfather used to buy her. Food really does connect us to memories.
Getting the Filling Right
I learned the hard way that the peanut butter filling needs to be thick enough to stay put but soft enough to pipe. If yours is too stiff, add another teaspoon of milk. Too runny and it will soak into the cupcake instead of staying in the center.
Working With Butterfingers
Crushing Butterfingers can be tricky because they're sticky. Put them in a ziplock bag and use a meat mallet or rolling pin. The finer crush goes in the frosting while bigger pieces create that beautiful garnish on top.
Make Ahead Strategy
You can bake the cupcakes and make both fillings a day ahead, but frost them right before serving for the freshest taste. Store unfilled cupcakes in an airtight container and the fillings covered in the refrigerator.
- Bring everything to room temperature before assembling
- The filling actually gets easier to work with after chilling for an hour
- Add crushed Butterfingers to frosting just before piping to keep them crunchy
 Save to Pinterest
 There's something magical about biting through that chocolate cake and hitting that surprise peanut butter center. Hope these become as loved in your house as they are in mine.
Recipe FAQs
- → Can I make these cupcakes ahead of time?
-
Yes, you can bake the cupcakes a day in advance. Store them in an airtight container at room temperature. Fill and frost them on the day you plan to serve for the freshest texture and presentation.
- → How do I store leftover cupcakes?
-
Keep finished cupcakes in an airtight container in the refrigerator for up to 3 days. Bring them to room temperature for about 30 minutes before serving to enjoy the best flavor and texture.
- → Can I substitute the peanut butter filling?
-
Absolutely! Almond butter or cashew butter work well as substitutes. You could also use Nutella for a chocolate-hazelnut variation, or skip the filling entirely for simpler cupcakes.
- → Why is coffee added to the cupcake batter?
-
Coffee enhances the chocolate flavor without adding a coffee taste. The acidity and bitterness help deepen the cocoa notes, making the chocolate taste more intense and rich.
- → What's the best way to crush Butterfinger bars?
-
Place unwrapped bars in a sealed plastic bag and use a rolling pin or meat mallet to crush them. For finer pieces for the frosting, pulse briefly in a food processor. Keep some larger chunks for garnish.
- → Can I freeze these cupcakes?
-
You can freeze unfilled cupcakes for up to 3 months. Wrap them individually in plastic wrap, then place in a freezer bag. Thaw at room temperature before filling and frosting.