 Save to Pinterest
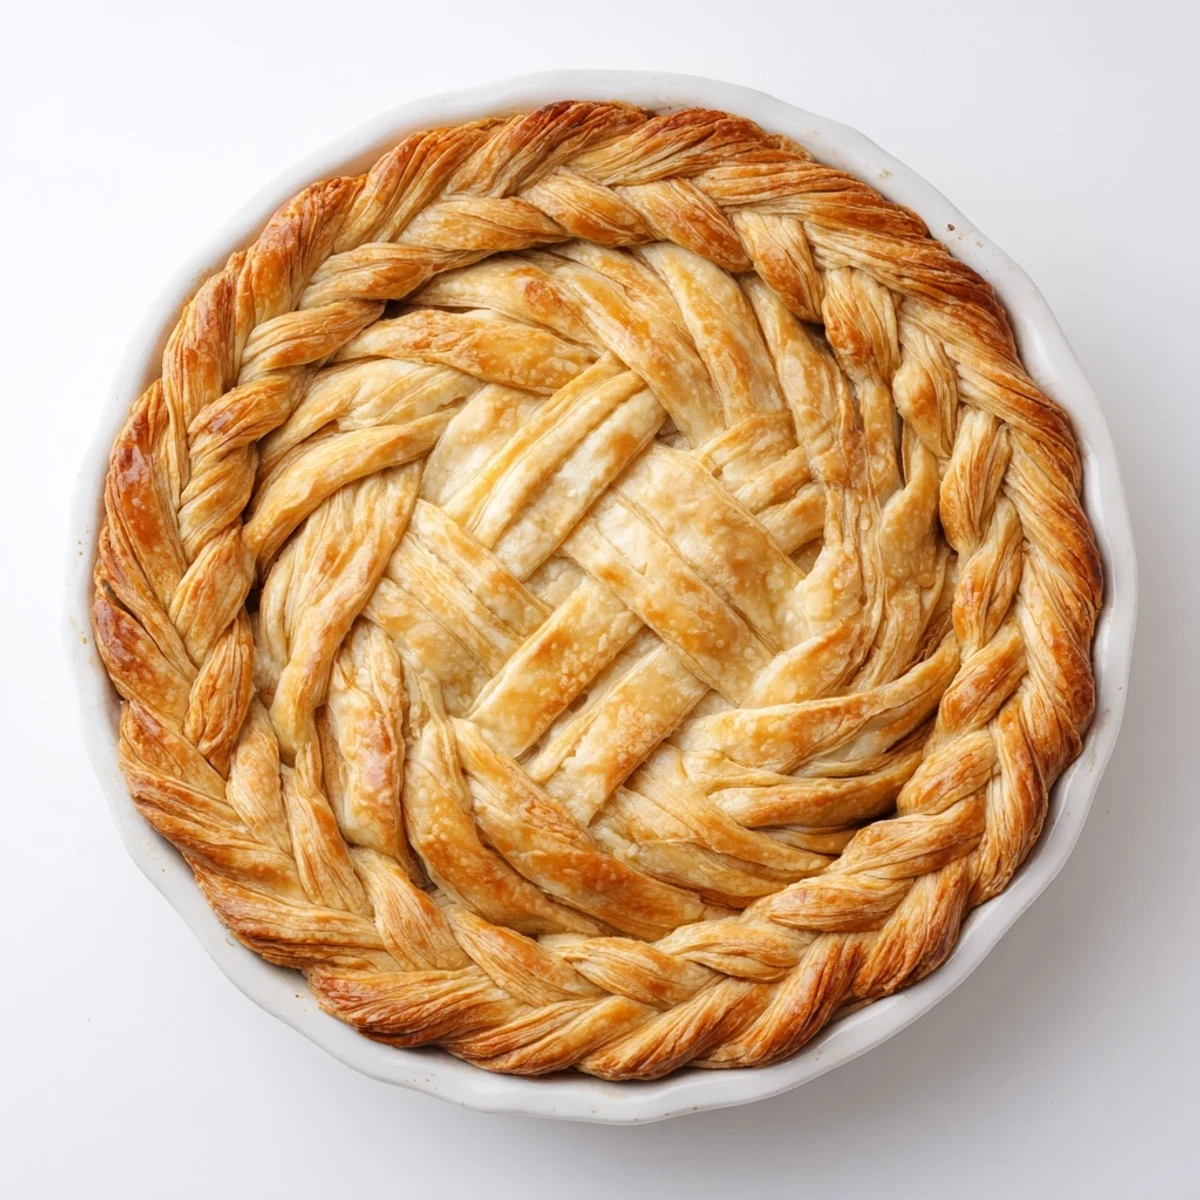
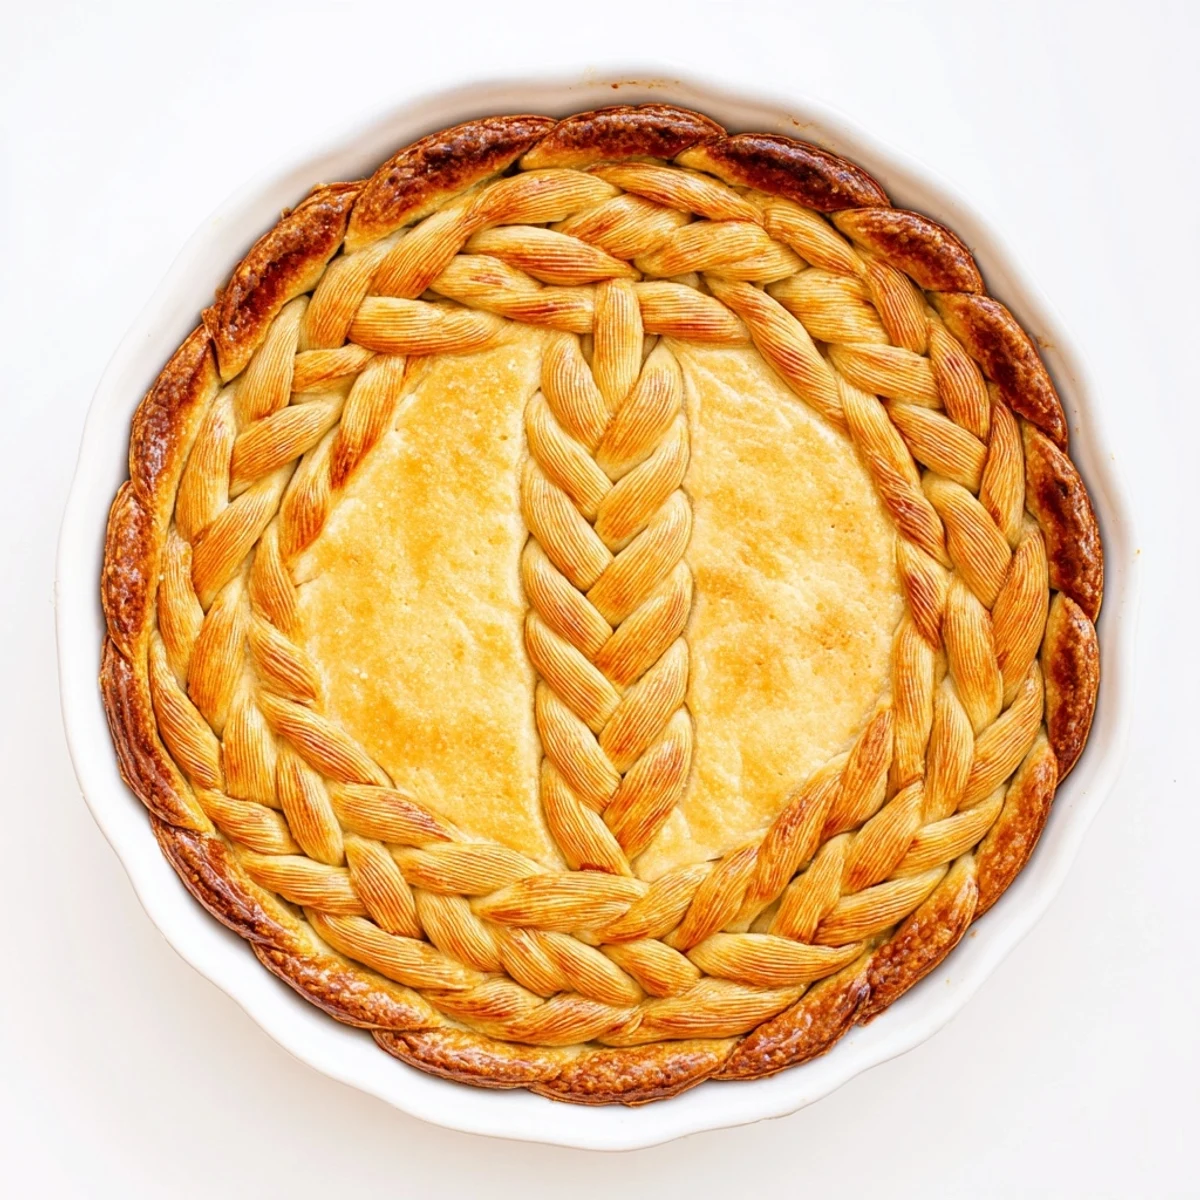
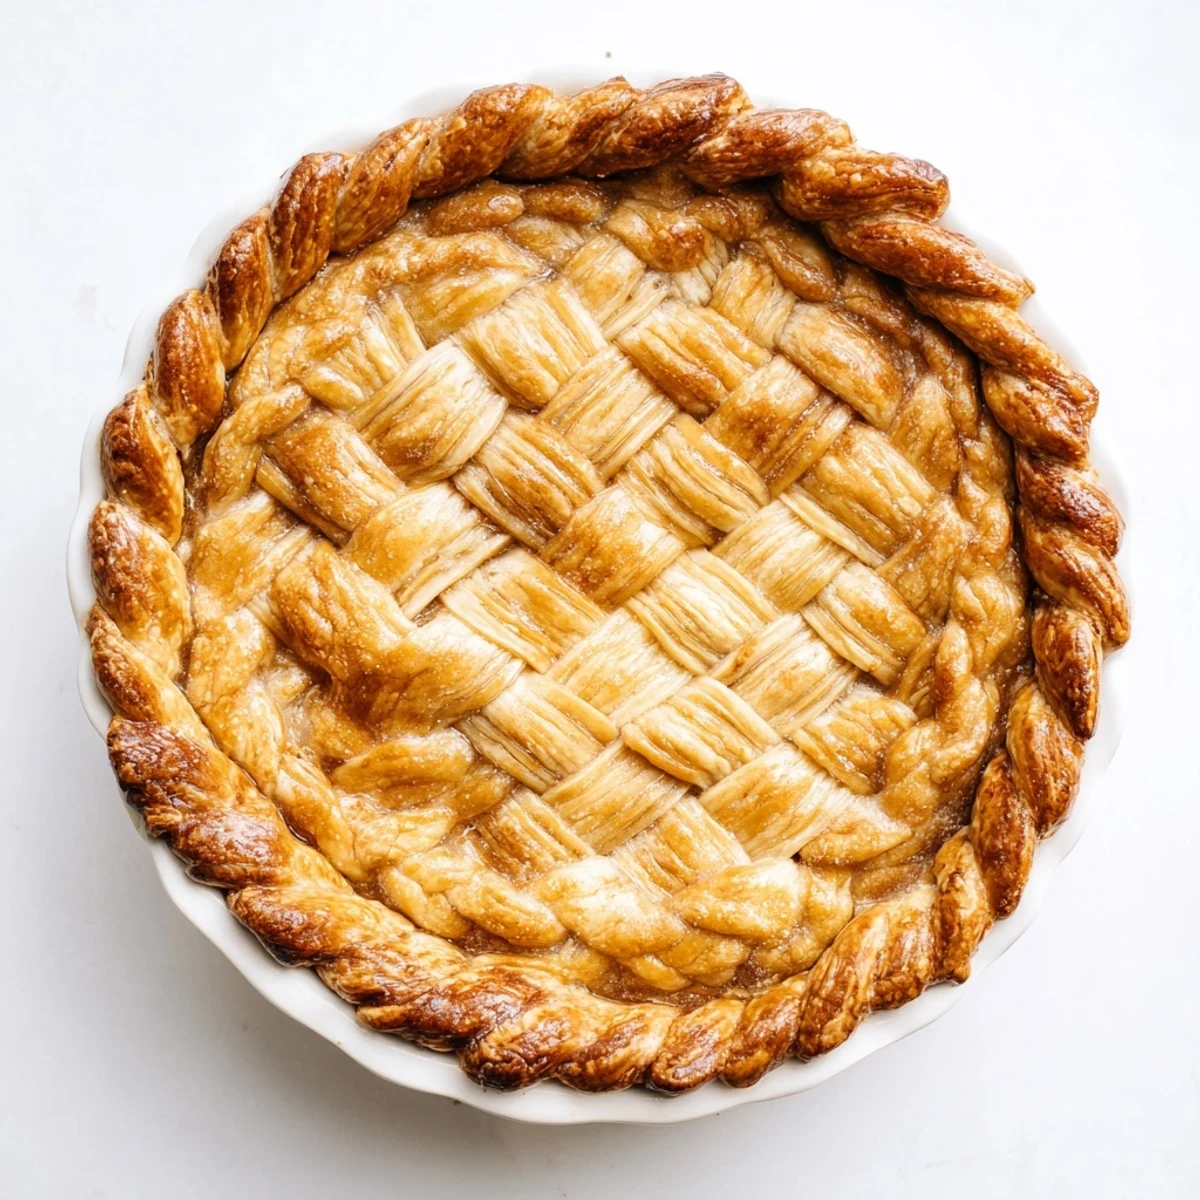
 Master the art of fishtail braiding for pie crusts with this straightforward technique. The process involves cutting dough strips, weaving them into an intricate fishtail pattern, and applying them to your pie edges. Total hands-on time takes about 35 minutes, resulting in a bakery-worthy finish that impresses guests. The method works beautifully for fruit pies, quiches, chicken pot pies, and any dish that benefits from decorative edging.
The first time I attempted a braided crust, my kitchen looked like a flour bomb had gone off. I'd seen those gorgeous pinterest-perfect pies and thought, how hard could it be? Three failed attempts later, I finally cracked the code to getting that bakery-worthy finish without the frustration. Now this fishtail braid crust has become my go-to trick for turning ordinary pies into conversation pieces.
I made this for my sister's baby shower last spring, and people literally gathered around the pie table taking photos. Someone asked if I'd hired a bakery to decorate it. Watching my mom's face when I revealed I'd braided the crust myself was priceless. That's when I knew this recipe wasn't just about food—it was about creating moments.
Ingredients
- All-purpose flour: This creates the structure for your braids, so don't be tempted to substitute completely with whole wheat or the strips might break while weaving
- Cold butter: Keep those cubes icy cold right until they hit the flour, because warm butter means tough dough and sad braids
- Ice water: Start with less than you think you need, adding just enough to bring the dough together without making it sticky or overworked
- Egg wash: This isn't just for pretty golden color—it helps seal the braid to your pie crust so everything stays put during baking
Instructions
- Mix your foundation:
- Whisk flour, salt, and sugar in a large bowl until combined, then work in cold butter until you see pea-sized chunks throughout
- Bring it together:
- Drizzle in ice water gradually, mixing with your hands just until the dough holds together when squeezed—stop immediately even if it looks slightly shaggy
- Chill out:
- Divide dough into two disks, wrap tightly, and refrigerate for at least one hour because warm dough spreads into sad, uneven strips
- Roll and measure:
- Roll one chilled disk into a rectangle about 1/8 inch thick, then use a ruler to cut at least six even strips approximately 12 inches long and 1/2 inch wide
- Master the fishtail:
- Lay three strips side by side, press ends together, then begin crossing the outermost strip to center alternating sides until you reach the end
- Seal the deal:
- Brush your filled pie edge with water, gently transfer braid to the rim, press lightly to adhere, and finish with egg wash for that golden glow
 Save to Pinterest
 My grandmother watched me make this once and said the braid reminded her of sewing fancy hems on dresses. She started braiding dough alongside me, her arthritis making her fingers slow but precise. We made three pies that afternoon, each one slightly wonkier than the last, but absolutely perfect in every way that matters.
Temperature Matters More Than You Think
Cold dough is the difference between braids that hold their shape and ones that melt into sad, flat ribbons. I've learned to keep a bowl of ice water nearby and even chill my rolling pin and work surface when my kitchen runs warm. The butter should stay in tiny cold pockets throughout the process, creating those flaky layers while keeping strips firm enough to handle.
The Braid Width Sweet Spot
After years of experimentation, I've settled on 1/2 inch wide strips as the perfect balance between delicate appearance and structural integrity. Anything thinner and they tear during braiding or become too fragile to transfer to your pie. Anything thicker and the braid looks chunky and overwhelms your filling. The ruler might feel like overkill, but consistent width makes the rhythm of braiding so much smoother.
Working With Different Doughs
Not all pie doughs behave the same way when cut into strips. Classic all-butter recipes give you the most workable braids, but adding shortening makes them more forgiving for beginners. Whole wheat doughs can be stubborn and prone to breaking, so mix in some white flour if you want that nutty flavor without the frustration.
- Practice the fishtail braid on three pieces of yarn or twine first—it builds muscle memory without wasting dough
- Keep a small bowl of flour nearby to dust your fingers if the strips start sticking while braiding
- If a strip tears, gently press it back together; the egg wash will hide most imperfections after baking
 Save to Pinterest
 There's something deeply satisfying about turning a simple pie into a work of art with just a few extra minutes of effort. Every time I pull a braided-crusted pie from the oven, I'm reminded that the best recipes are the ones we make our own.
Recipe FAQs
- → Can I make the braids ahead of time?
-
Yes, prepare and chill braids on parchment paper for up to 24 hours before applying to your pie.
- → What if my dough strips break while braiding?
-
Press broken ends together firmly with damp fingers. The egg wash helps seal everything during baking.
- → Do I need special tools for this technique?
-
A ruler and pizza cutter ensure even strips, but a knife works. A pastry brush applies egg wash evenly.
- → Can I use store-bought dough?
-
Refrigerated pie dough works well. Let it thaw slightly before cutting strips for easier handling.
- → How many braids do I need per pie?
-
One standard 9-inch pie typically requires 2-3 braids, depending on strip thickness and braid tightness.
- → Will the braid burn before the pie filling cooks?
-
If filling needs longer baking time, cover edges with foil during the last 15 minutes or shield with a pie crust shield.