 Save to Pinterest
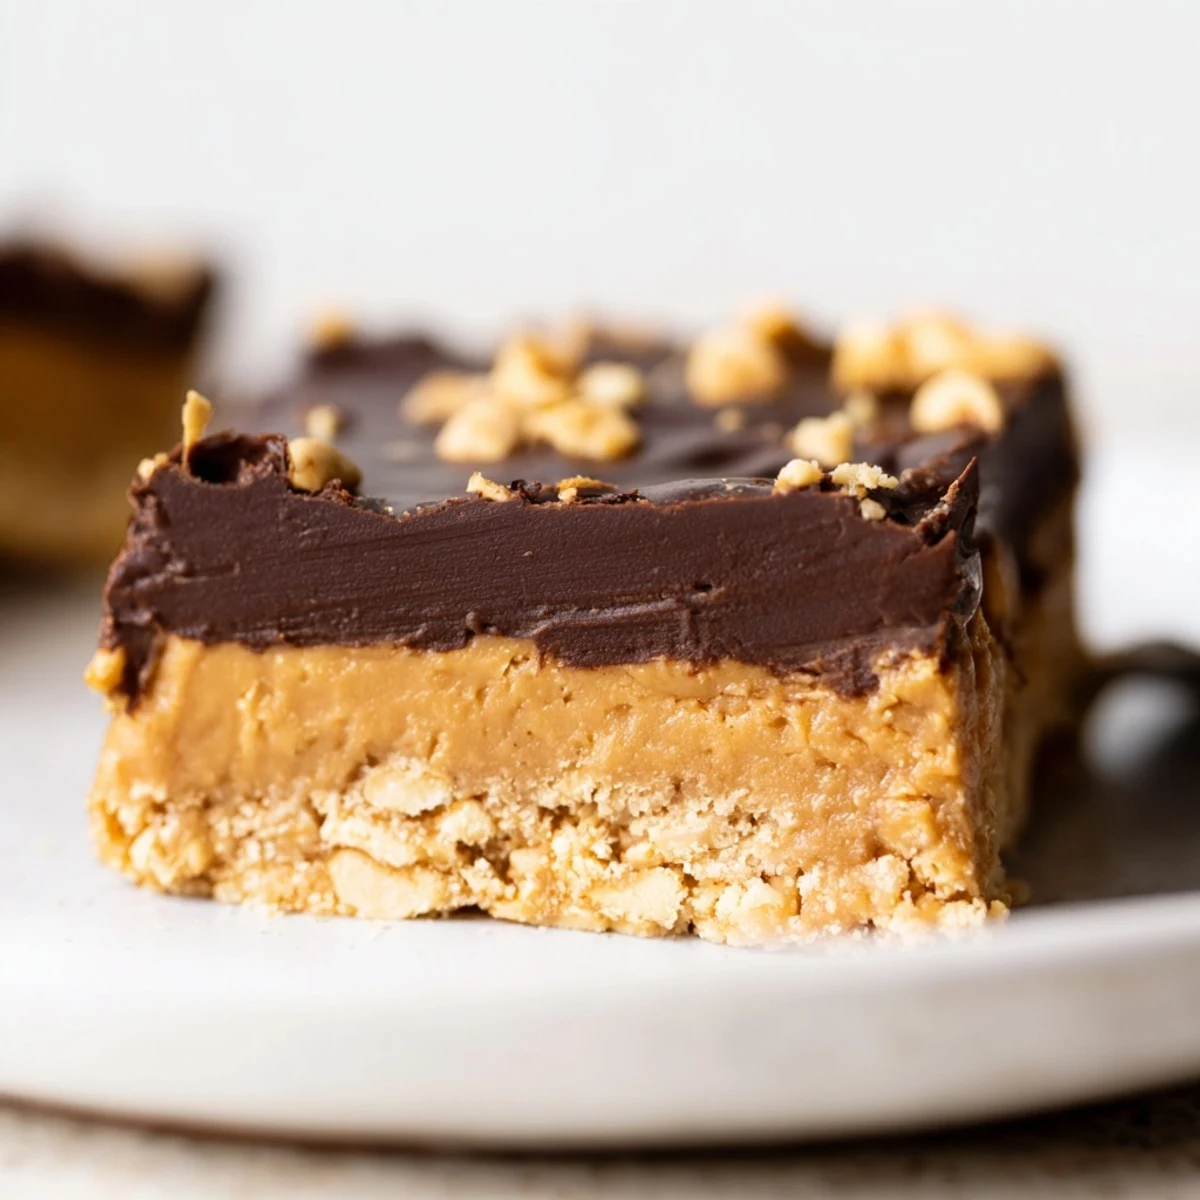
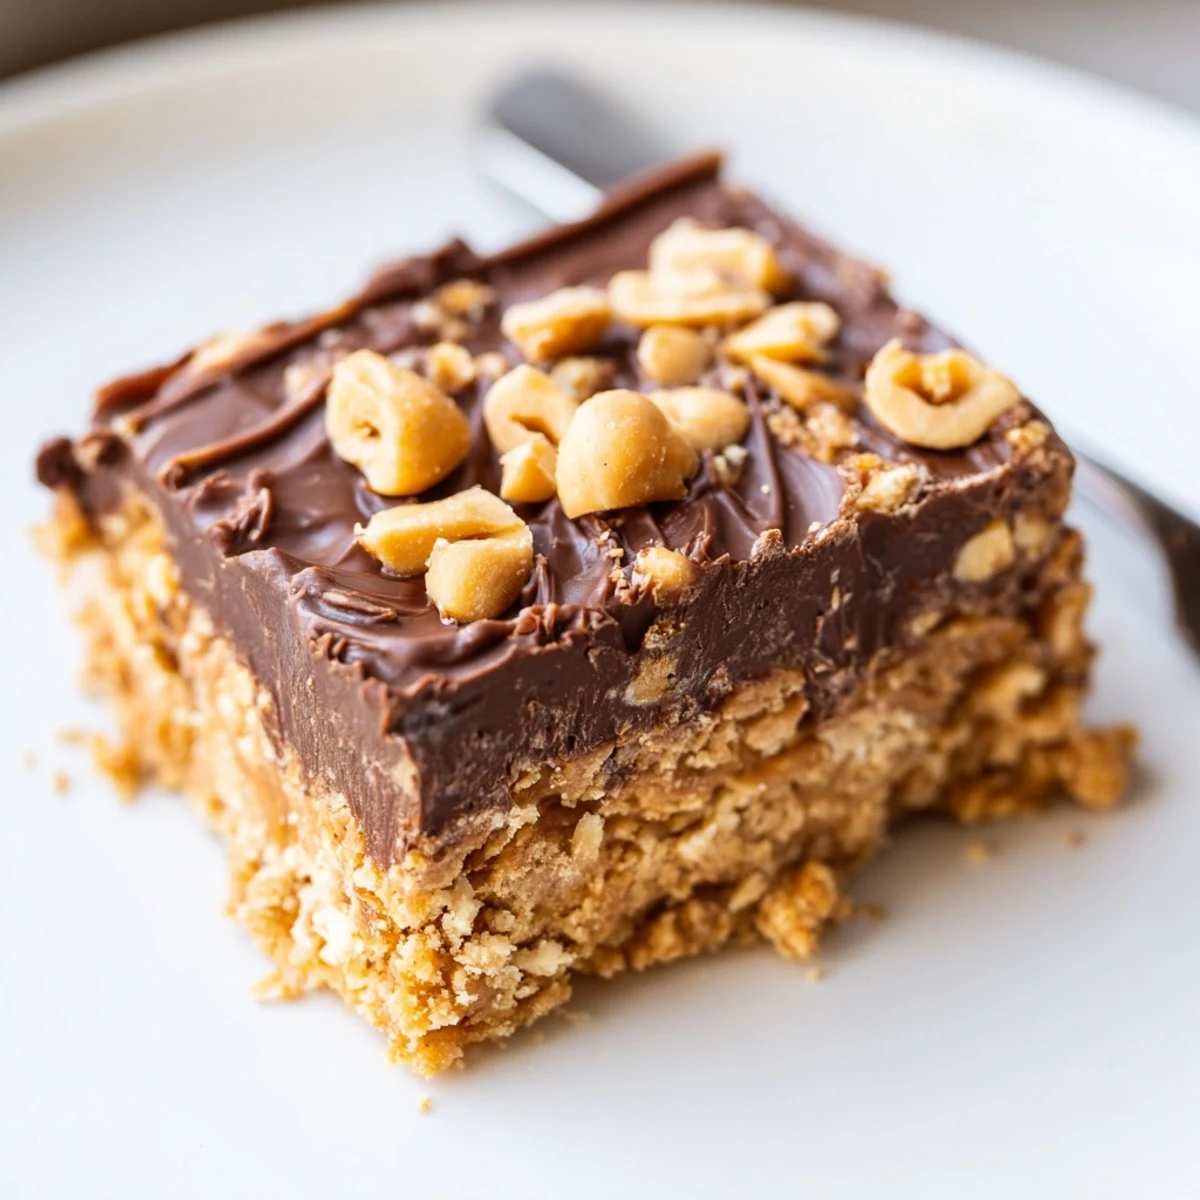
 In about 15 minutes of hands-on time and 2 hours of chilling, creamy peanut butter and melted butter are combined with graham cracker crumbs and powdered sugar to form a compact base. Press into a 9x13-inch pan, pour a melted semi-sweet chocolate and peanut butter topping, then chill until firm. Slice into 16 bars. Add chopped roasted peanuts for crunch or swap digestive biscuits for the graham crumbs. Store chilled or freeze for longer keeping.
The summer I turned fourteen, my mother went through a phase where she banned the oven from June through August, declaring the kitchen a heat free zone. That left me desperate for something sweet and resourceful enough to start digging through the pantry. I found a jar of peanut butter, a sleeve of graham crackers, and a bag of chocolate chips, and what happened next changed my snacking life forever.
I brought a tray of these to a neighborhood potluck and watched three adults hover over the plate like they were guarding treasure. One neighbor actually asked if I had ordered them from a bakery, which remains one of the proudest moments of my teenage years.
Ingredients
- 1 cup (240 g) creamy peanut butter: Use the regular kind, not natural or stir required, because the stabilizers help the base set firmly and slice cleanly.
- 1/2 cup (115 g) unsalted butter, melted: Melted butter binds everything together without making the mixture greasy, and unsalted lets you control the sweetness.
- 2 cups (200 g) graham cracker crumbs: Pulse whole crackers in a bag or food processor until fine, because uniform crumbs mean no weird crunchy pockets in your bars.
- 2 cups (240 g) powdered sugar: This dissolves into the base for sweetness and structure, so do not swap in granulated sugar unless you want a gritty surprise.
- 1 1/2 cups (270 g) semi sweet chocolate chips: Semi sweet balances the salty richness of the peanut butter layer perfectly.
- 1/4 cup (60 g) creamy peanut butter: Stirred into the melted chocolate, this keeps the topping soft enough to bite through even after chilling.
Instructions
- Prep your pan:
- Line a 9 by 13 inch baking dish with parchment paper, leaving overhang on the sides so you can lift the whole slab out later without wrestling it.
- Build the base:
- Stir the peanut butter and melted butter together in a large bowl until completely smooth and glossy. Add the graham cracker crumbs and powdered sugar, then mix until every crumb is coated and the dough feels uniform.
- Press it down:
- Transfer the mixture to your lined dish and press it firmly using a spatula or your palms until the surface is flat and even.
- Melt the topping:
- Combine the chocolate chips and remaining peanut butter in a microwave safe bowl, then heat in 30 second bursts, stirring between each, until the mixture is silky and lump free.
- Spread and chill:
- Pour the chocolate over the base and spread it edge to edge with a spatula. Refrigerate for at least two hours or until the top is completely set and firm to the touch.
- Slice and serve:
- Grab the parchment overhang to lift the whole block out of the pan, then cut into sixteen bars with a sharp knife.
 Save to Pinterest
 A friend once told me these bars got her through finals week in college, and honestly I believe it. Sometimes a recipe stops being a recipe and becomes a small reliable comfort in bar form.
Texture Upgrades Worth Trying
Fold half a cup of chopped roasted peanuts into the base if you want a satisfying crunch running through every bite. You could also swap the graham crackers for digestive biscuits, which add a slightly deeper, toasty flavor that pairs beautifully with the chocolate topping.
Storage That Actually Works
Keep the bars in the refrigerator in an airtight container and they stay fresh for a full week. You can freeze them for up to three months too, layered between sheets of parchment so they do not stick together.
What to Watch Out For
These bars contain peanuts, dairy, wheat, and possibly soy depending on your chocolate chips, so always check labels if you are serving anyone with allergies. A few small considerations go a long way toward making sure everyone at the table gets to enjoy them safely.
- Let frozen bars thaw in the fridge overnight rather than on the counter for the best texture.
- If the base feels too sticky to press, wet your hands slightly and it will cooperate.
- Always use full fat peanut butter for the most reliable set and flavor.
 Save to Pinterest
 Keep a batch in your freezer and you will never show up empty handed to a last minute gathering again. These bars have a way of making people feel taken care of with almost no effort at all.
Recipe FAQs
- → How long should the bars chill before cutting?
-
Chill for at least 2 hours, or until the base is firm and the chocolate topping has set. For cleaner slices, refrigerate longer or return to the fridge after cutting.
- → Can I use crunchy peanut butter?
-
Yes. Crunchy peanut butter adds texture to the base; fold in an extra 1/2 cup of chopped roasted peanuts if you want more bite.
- → What’s the best way to melt the chocolate topping?
-
Microwave in 30-second bursts, stirring between intervals until smooth. Alternatively, melt over a simmering water bath for gentler heat and fewer chances of seizing.
- → Any swap suggestions for graham crackers?
-
Use crushed digestive biscuits, shortbread, or even chocolate wafers for a different flavor profile. Adjust powdered sugar slightly if the substitute is sweeter or denser.
- → How should I store these bars?
-
Keep refrigerated in an airtight container for up to one week. For longer storage, freeze in a sealed container for up to three months; thaw in the fridge before serving.
- → Can I make these nut-free?
-
To avoid peanuts, substitute a seed butter such as sunflower seed butter and use a nut-free chocolate. Note that flavor and texture will differ from the original peanut version.