Save to Pinterest
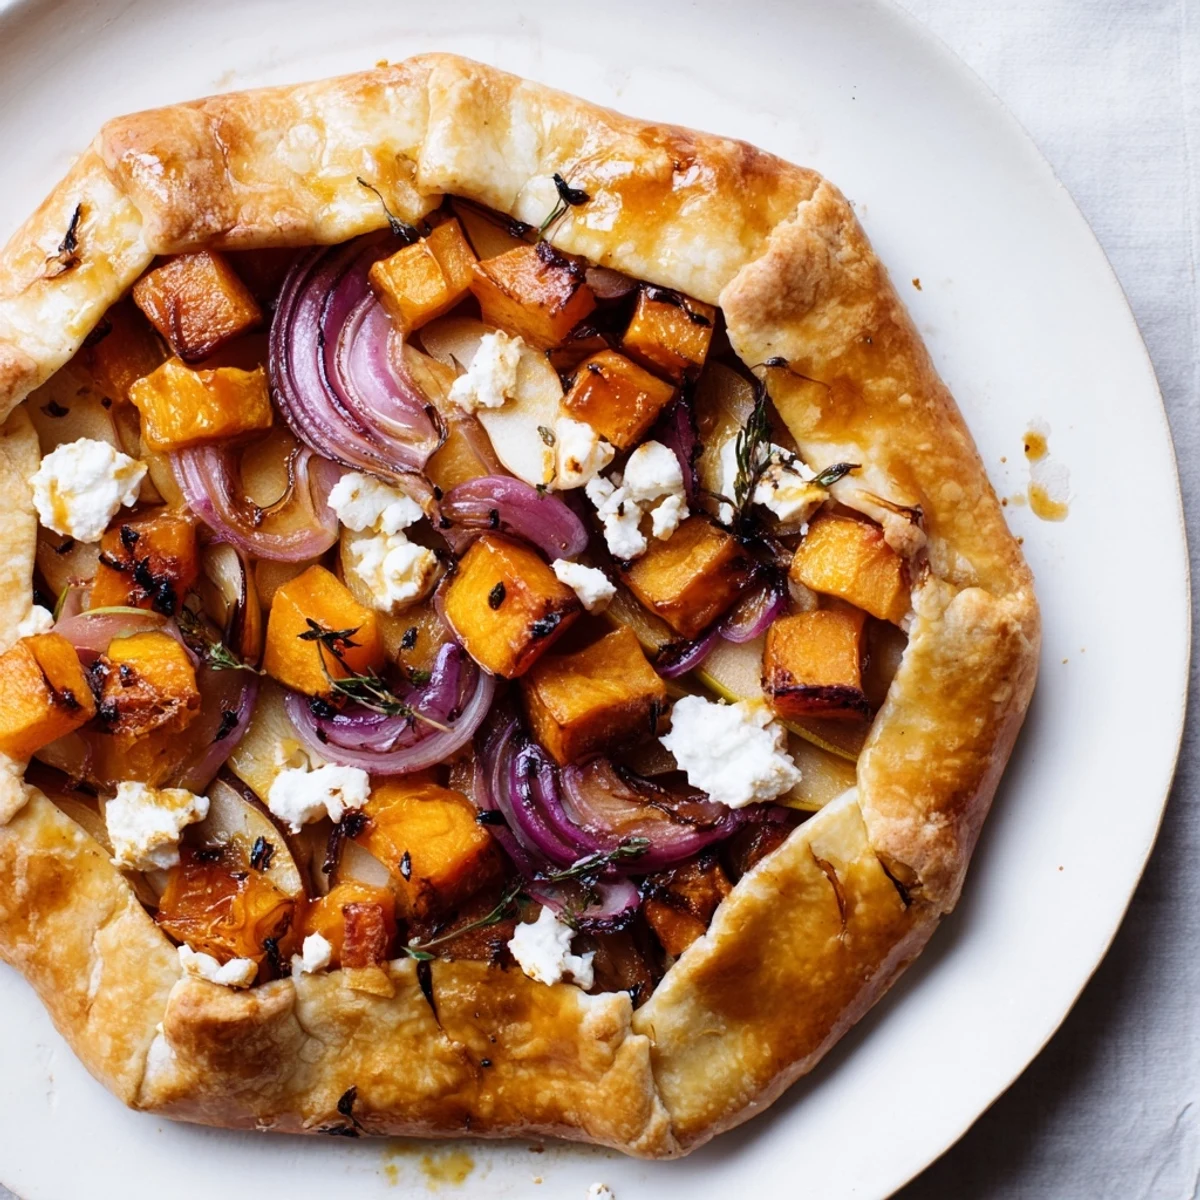
 This rustic tart combines caramelized butternut squash cubes with thinly sliced tart apples, all wrapped in a flaky golden crust. The squash and apples are roasted with olive oil, fresh thyme, and a touch of honey or maple syrup for balanced sweetness and savoriness. Optional tangy goat cheese adds depth, while a light sugar sprinkle on the baked crust contributes a subtle crunch. Ideal for autumn meals, it offers a comforting blend of textures and flavors that pair beautifully with crisp white wines.
Preparation involves roasting the butternut squash and apples until tender and caramelized, then layering them over a chilled, flaky dough disk. The crust edges are folded over the filling, brushed with egg wash, and baked until golden brown. The resulting tart is a perfect centerpiece, offering both warmth and brightness on the palate.
One October afternoon, I was standing at the farmers market with nothing but vague hunger and a craving for something that tasted like the season itself. A vendor handed me a small butternut squash so perfectly shaped I almost didn't want to cut into it, then I spotted the apples nearby—tart Granny Smiths that made my mouth water just looking at them. By the time I got home, I knew exactly what I wanted to make: a galette that would let both ingredients shine, wrapped in the flakiest crust I could manage.
I made this for a small dinner party last November, and I remember the exact moment one of my guests took their first bite—their eyes lit up at that combination of sweet and savory, the flaky crust shattering under their fork. Someone asked if I'd gone to culinary school, and I laughed because really, it was just following my instincts and letting the seasons do the heavy lifting. That's when I realized this galette had become one of those dishes I'd make again and again.
Ingredients
- Butternut squash (1 small, about 1 lb): Cut into ½-inch cubes so they roast evenly and caramelize beautifully—this size is the sweet spot between tender inside and crispy edges.
- Tart apples (2 medium, like Granny Smith): The acidity keeps the galette from feeling too heavy and cuts through the richness of the butter crust perfectly.
- Red onion (1 small): Sliced thin and roasted until soft, it adds a subtle sweetness and depth that quietly elevates everything.
- All-purpose flour (1½ cups): The foundation of your crust—measure by spooning and leveling, not scooping, to avoid a tough dough.
- Cold unsalted butter (½ cup): This is non-negotiable; the coldness creates those tender, flaky layers when you fold the edges.
- Ice water (¼ cup): Keep it truly cold, and add it slowly—you want just enough to bring the dough together without making it wet.
- Olive oil (2 tbsp): This coats the vegetables and helps them caramelize during roasting.
- Fresh thyme (1 tbsp): If you have fresh, use it; dried works, but fresh thyme scattered through roasted squash is a small luxury.
- Honey or maple syrup (1 tbsp): The drizzle that ties savory and sweet together, brushed right over the filling.
- Goat cheese or feta (½ cup, optional): Crumbles add a tangy richness that makes people wonder what your secret ingredient is.
- Egg wash (1 beaten egg): This gives your crust that beautiful golden-brown shine that makes it look professional.
Instructions
- Heat your oven and prep your workspace:
- Preheat to 425°F and line a baking sheet with parchment paper—this is your stage for everything that comes next.
- Toss and roast the vegetables:
- Combine butternut squash cubes, apple slices, and red onion in a bowl, coat generously with olive oil, thyme, salt, and pepper, then spread on the sheet in a single layer. Roast for 20–25 minutes, stirring halfway through, until the squash is tender and the edges are starting to catch color—you're looking for a little caramelization to deepen the flavors.
- Make the dough while things roast:
- Pulse flour and salt together, then cut in the cold butter cubes until the mixture looks like coarse sand with some pea-sized pieces still visible. Drizzle in ice water a little at a time, stirring gently until the dough just barely comes together—don't overwork it or you'll regret it when you bite into a tough crust.
- Chill and rest:
- Shape the dough into a disk, wrap it, and let it chill for at least 20 minutes while the oven works its magic on your vegetables.
- Roll out your canvas:
- On a lightly floured surface, roll the dough into a 12-inch circle, working gently and evenly—if it resists, let it rest for a minute and try again. Transfer it to a fresh parchment-lined baking sheet.
- Arrange the filling:
- Mound the roasted vegetables in the center, leaving a 2-inch border of bare dough all around—this is where the magic happens when you fold up those edges. Drizzle with honey and scatter cheese over the top if you're using it.
- Fold and seal:
- Gently fold the dough border up and over the filling, pleating it naturally as you go around—rough and rustic is exactly the look you want. Brush the exposed crust with beaten egg and sprinkle with coarse sugar if you'd like extra crunch.
- Final bake:
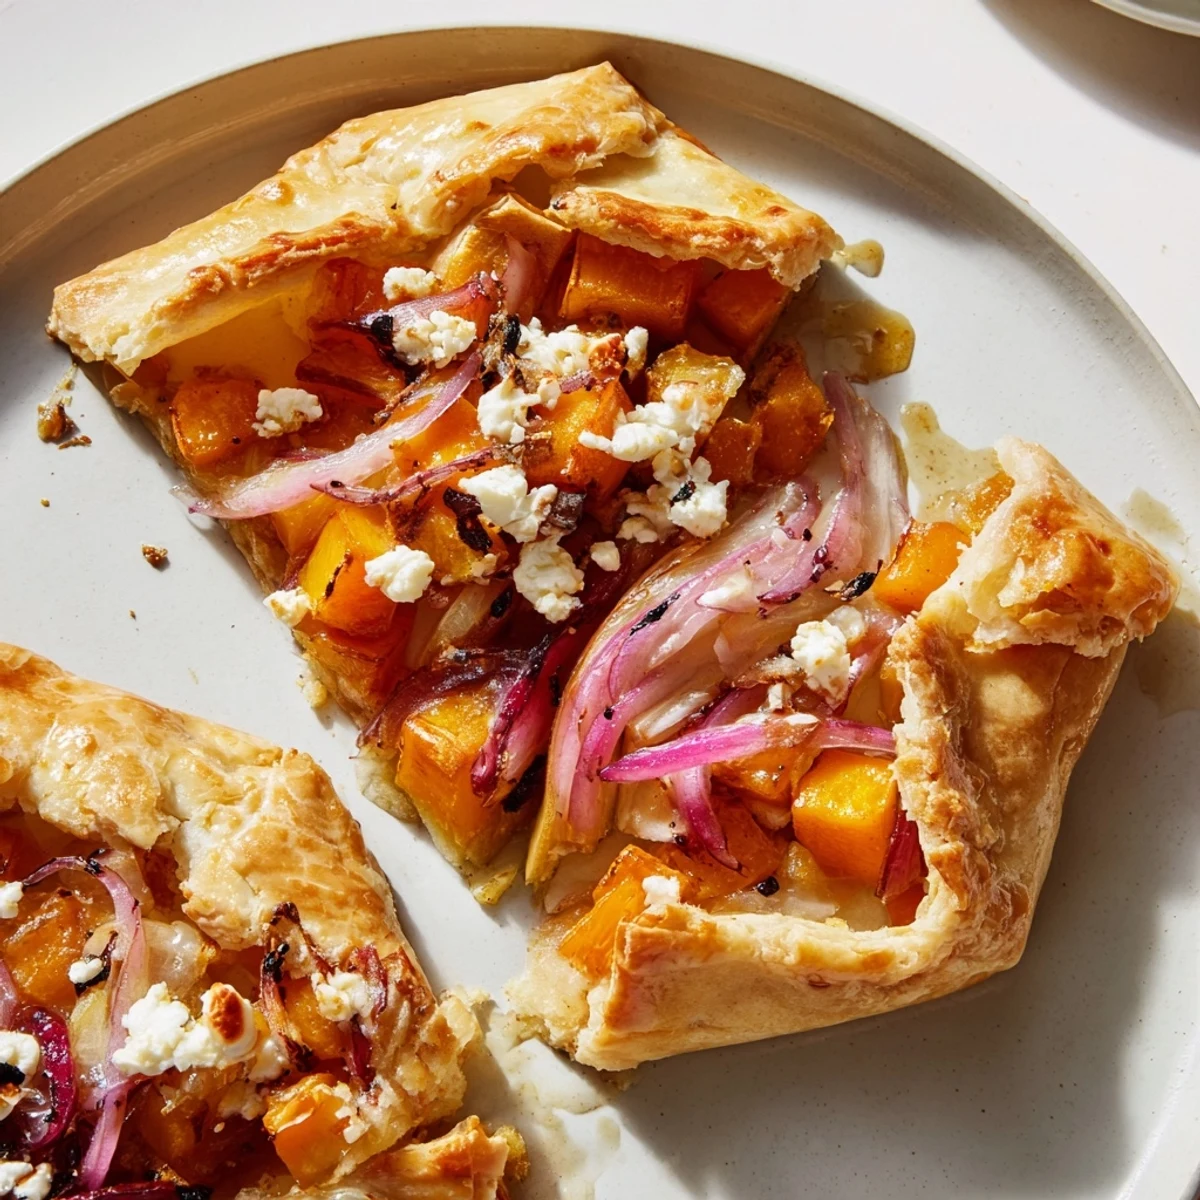
- Bake for 25–30 minutes until the crust is deep golden and the edges are crisp, watching for the last few minutes so it doesn't darken too much. Let it cool slightly—this gives the filling time to set so it doesn't slide everywhere when you cut into it.
 Save to Pinterest
 There's something almost meditative about folding that dough border up around the filling, knowing that imperfection is the whole point—the rustic pleats are what make a galette feel homemade in the best way. When it comes out of the oven golden and fragrant, you'll understand why this became one of my go-to dishes.
Why This Works as a Main Course
A lot of people think galettes are dessert or appetizers, but this one holds its own as a centerpiece because the roasted squash is hearty enough to anchor a meal, and the tart apples give it complexity that feels complete. Pair it with a crisp salad and maybe some crusty bread, and you've got a dinner that feels both elegant and deeply satisfying.
Making It Vegan or Dairy-Free
If you're cooking for people with dietary restrictions, this galette adapts beautifully—vegan butter works just as well as regular butter for the crust (keep it just as cold), and plant-based milk brushed on instead of egg wash still gives you a golden finish. Skip the cheese entirely or scatter some toasted nuts for richness and texture instead.
Serving and Storage
This galette is wonderful warm straight from the oven, but it's equally good at room temperature, which means you can make it in the afternoon and serve it hours later without worry. Leftovers keep well in an airtight container in the fridge for up to three days, and a quick 10-minute oven warm-up brings back that fresh-baked quality.
- Pour a glass of crisp Sauvignon Blanc or similar white wine to play off the squash and apples.
- Consider adding toasted pecans or walnuts scattered over the filling for an extra layer of texture and earthiness.
- If your filling looks too wet as you're assembling, drain the vegetables on paper towels first—a dry galette stays together much better.
 Save to Pinterest
 This galette became the recipe I reach for whenever I want to feel like I've done something special in the kitchen without actually spending hours there. Make it once and you'll know why.
Recipe FAQs
- → How do I prepare the butternut squash for roasting?
-
Peel and seed a small butternut squash, then cut it into ½-inch cubes. Toss with olive oil, thyme, salt, and pepper before roasting for about 20–25 minutes until tender and caramelized.
- → Can I substitute the tart apples with another fruit?
-
Yes, firm and slightly tart apples like Granny Smith work best, but you may also use crisp pears for a similar texture and flavor balance.
- → What is the best way to achieve a flaky galette crust?
-
Keep butter cold and work it quickly into the flour until crumbly. Add ice water sparingly and chill the dough before rolling to ensure flakiness.
- → Is there a vegan option for this tart?
-
Absolutely. Use vegan butter in the dough, omit the cheese, and brush the crust with plant-based milk instead of egg wash for a vegan-friendly version.
- → How do I store leftovers to maintain freshness?
-
Cover leftover tart tightly and refrigerate for up to 3 days. Reheat gently in the oven to preserve crust crispness and warm the filling evenly.
- → Can I add nuts for extra texture?
-
Yes, toasted pecans or walnuts can be sprinkled on top or mixed into the filling before baking for a delightful crunch.