 Save to Pinterest
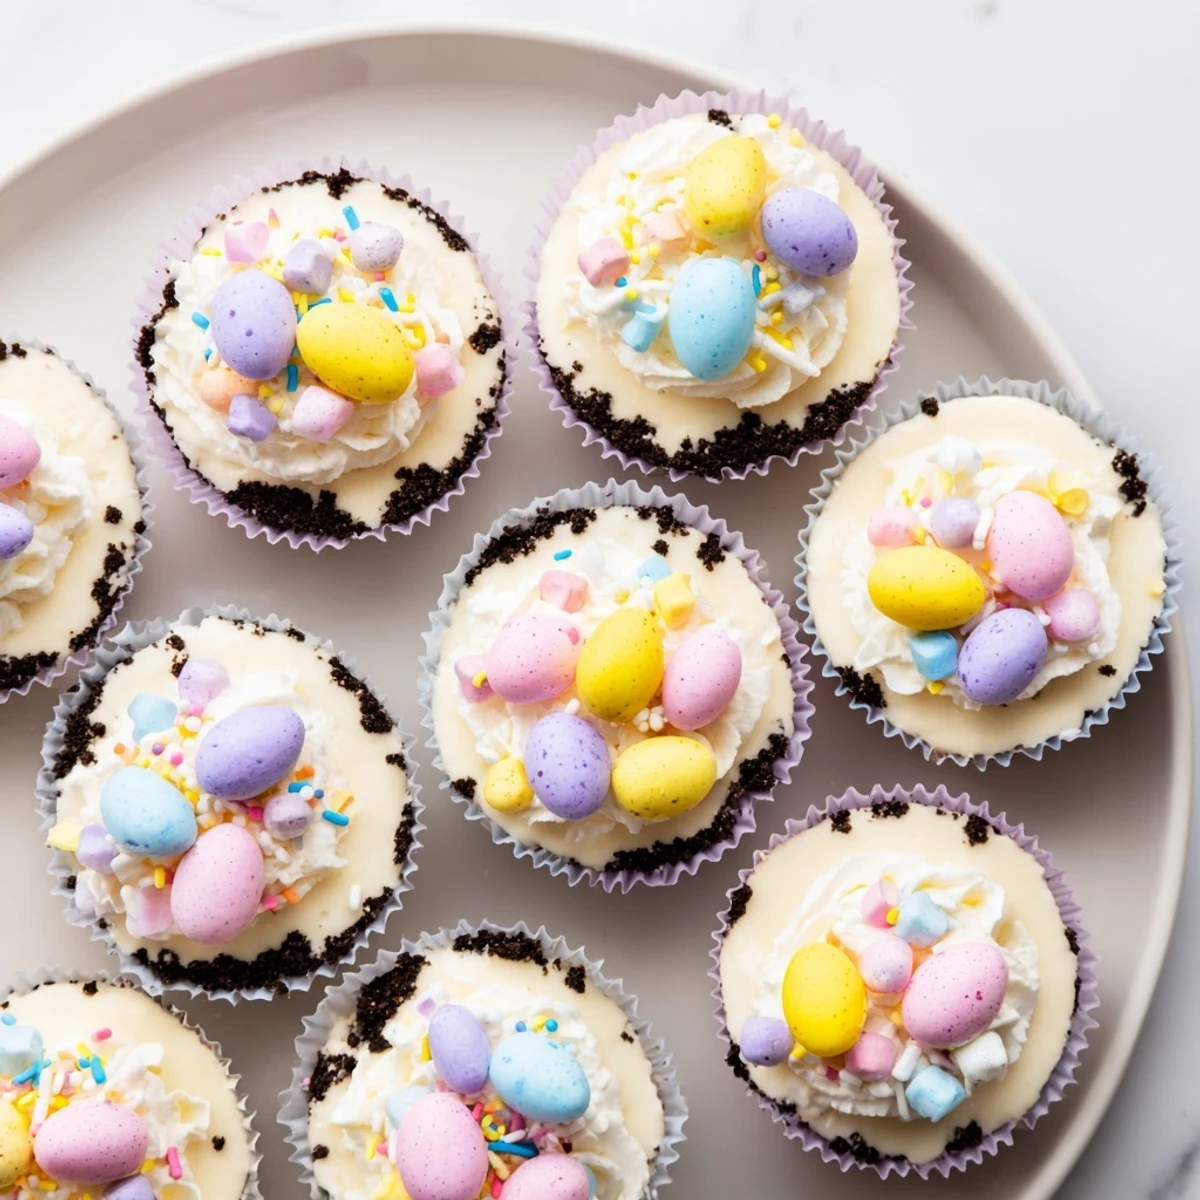
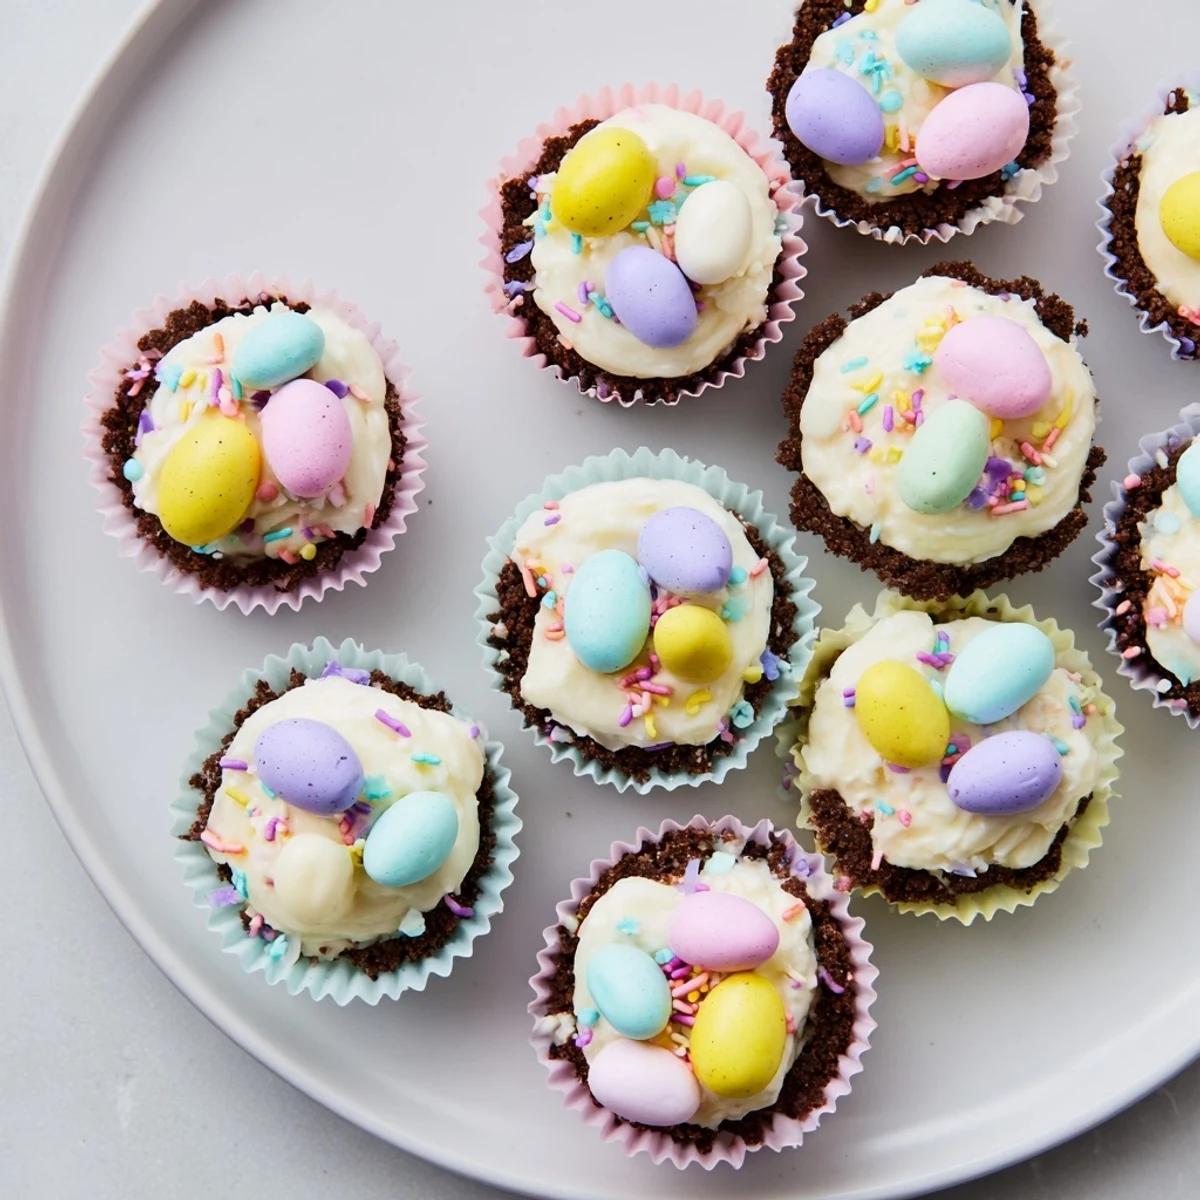
 These delightful Easter-inspired mini cheesecakes feature a rich chocolate cookie crust topped with velvety smooth cream cheese filling and finished with freshly whipped cream and colorful Cadbury Mini Eggs. The individual portions make them perfect for spring gatherings, Easter brunch, or dessert buffets.
The chocolate sandwich cookie crust provides a crisp, cocoa-rich foundation that complements the tangy, creamy cheesecake layer. After baking until just set, these chilled delights are crowned with lightly sweetened whipped cream and the signature pastel chocolate eggs that make them instantly festive.
With just 20 minutes of prep time and an easy assembly process, you can create a bakery-worthy dessert that looks impressive but comes together with simple pantry ingredients. The result is a decadent, bite-sized treat that captures all the flavors of spring in every creamy, crunchy, chocolatey bite.
The buttery chocolate smell alone stopped my roommate in her tracks last Easter. I'd been testing these mini cheesecakes all week, trying to get the crust-to-filling ratio just right. When I pulled that first batch from the oven, she wandered in with sleepy eyes and immediately reached for one. They've been our spring tradition ever since.
My niece helped me make these last year and may have eaten more Mini Eggs than actually made it onto the cheesecakes. Watching her carefully place each colorful egg half like she was arranging tiny edible jewels was absolutely precious. She now claims she's the official Easter egg decorator.
Ingredients
- Chocolate sandwich cookies: The chocolate cookie crust creates this incredibly rich foundation that complements the tangy cheesecake filling perfectly. I crush them in a food processor, but putting them in a ziplock bag and letting kids smash them works too.
- Unsalted butter: Melted butter binds the crumbs together into that essential crunchy base. Room temperature butter melts more evenly into the cookie crumbs.
- Cream cheese: This is the star of the show, so use full-fat cream cheese and let it soften completely at room temperature. Cold cream cheese creates lumps that never quite disappear, no matter how long you beat it.
- Granulated sugar: Just enough sweetness to balance the tang without making these cloying. The sugar also helps create that silky smooth texture we all want in cheesecake.
- Large egg: Room temperature eggs incorporate more easily into the batter. One egg is all you need for twelve individual cheesecakes.
- Vanilla extract: Pure vanilla extract adds that warm, aromatic background note that makes everything taste homemade. I've tried skipping it and these definitely miss something without it.
- Sour cream: The secret ingredient that adds tanginess and makes the filling incredibly creamy. Greek yogurt works in a pinch but sour cream gives the best texture.
- Heavy cream: Cold heavy cream whips up into those beautiful stiff peaks that crown each cheesecake. The cream needs to be thoroughly chilled or it won't whip properly.
- Powdered sugar: Just a tablespoon sweetens the whipped cream without making it too heavy. The cornstarch in powdered sugar also helps stabilize the whipped cream.
- Cadbury Mini Eggs: These colorful chocolate candies are what make the recipe Easter-perfect. Chopping them releases more chocolate flavor, but leaving them whole creates that signature speckled egg look.
Instructions
- Preheat your workspace:
- Preheat oven to 160°C (325°F) and line a 12-cup muffin tin with paper liners. This step goes faster if you gather all ingredients before starting.
- Build the crust foundation:
- In a bowl, combine crushed chocolate cookies and melted butter. Mix until crumbs are evenly moistened and hold together when squeezed. Divide the crumb mixture evenly among the liners (about 1 tbsp per cup) and press down firmly using the back of a measuring spoon or your fingers to form a solid base.
- Create the creamy filling:
- In a large bowl, beat cream cheese and granulated sugar until smooth and creamy. This takes about 2 minutes with an electric mixer. Add the egg, vanilla extract, and sour cream. Beat until just combined—do not overmix as this can cause cracks.
- Fill and bake:
- Spoon the cheesecake filling evenly over each crust (about 2 tbsp per cup), smoothing the tops with a small spatula. Bake for 16–18 minutes, or until centers are just set with a slight jiggle. Remove from oven and cool in tin for 30 minutes, then transfer to the refrigerator to chill for at least 2 hours.
- Finish with flourish:
- Just before serving, whip the heavy cream with powdered sugar until stiff peaks form. Pipe or dollop whipped cream on top of each cheesecake. Garnish with chopped or whole Mini Eggs and optional pastel sprinkles. Serve chilled.
 Save to Pinterest
 Last year I brought these to a potluck and watched them disappear in under five minutes. The host actually saved the last one for herself, hiding it in the back of the fridge behind some leftovers. I consider that the ultimate compliment.
Making Them Ahead
You can make the cheesecake bases up to two days in advance and store them tightly covered in the refrigerator. The whipped cream topping goes on right before serving or it loses its fluffy texture. I've also frozen the undecorated cheesecakes for up to a month—just thaw overnight in the fridge.
Getting The Crush Right
The perfect crust texture comes from cookies crushed into fine crumbs with some slightly larger pieces remaining for texture. A food processor gives the most consistent results in about 30 seconds of pulsing. Just don't overprocess or you'll end up with cookie dust that won't hold together well.
Decorating Like A Pro
Piping the whipped cream through a large star tip creates those beautiful bakery-style swirls that make these look incredibly impressive. A simple ziplock bag with the corner snipped off works in a pinch if you don't have piping bags.
- Press decorations gently into the cream so they adhere without squishing your perfect swirls
- Whole Mini Eggs create the most dramatic presentation while chopped ones distribute chocolate throughout every bite
- Add sprinkles immediately after piping before the cream has a chance to set or they'll just roll right off
 Save to Pinterest
 These little cheesecakes have become such a beloved part of our Easter celebration that I'm not sure I could get away with not making them anymore. Hope they bring some colorful joy to your spring table too.
Recipe FAQs
- → Can I make these ahead of time?
-
Yes, these mini cheesecakes are perfect for making ahead. Prepare and chill them for up to 2 days before serving. Add the whipped cream topping and Mini Eggs garnish just before serving for the freshest presentation and texture.
- → Can I freeze Easter Cadbury mini cheesecakes?
-
Absolutely! Freeze the plain cheesecakes (without whipped cream topping) for up to 2 months. Wrap each individually or store in an airtight container. Thaw overnight in the refrigerator before topping with whipped cream and serving.
- → What can I substitute for Cadbury Mini Eggs?
-
You can use any chocolate candy-coated eggs, pastel M&Ms, or even chopped chocolate bars. For a year-round version, try crushed Kit Kats, chocolate shavings, or fresh berries when Mini Eggs aren't seasonally available.
- → Why did my cheesecakes crack?
-
Overbaking is the most common cause of cracking. Remove them from the oven when the centers still have a slight jiggle—they'll continue cooking as they cool. Also, avoid overmixing the filling once the egg is added to prevent incorporating too much air.
- → Can I use a different crust?
-
Definitely! While chocolate sandwich cookies provide a rich, dark contrast, you can use graham crackers for a classic flavor, vanilla wafers for a lighter crust, or even chocolate graham crackers for an extra cocoa boost.
- → How do I know when they're done baking?
-
The cheesecakes are ready when the edges are set but the centers still have a gentle wobble, similar to gelatin. They'll firm up completely during chilling. A toothpick inserted in the center should come out clean but moist.